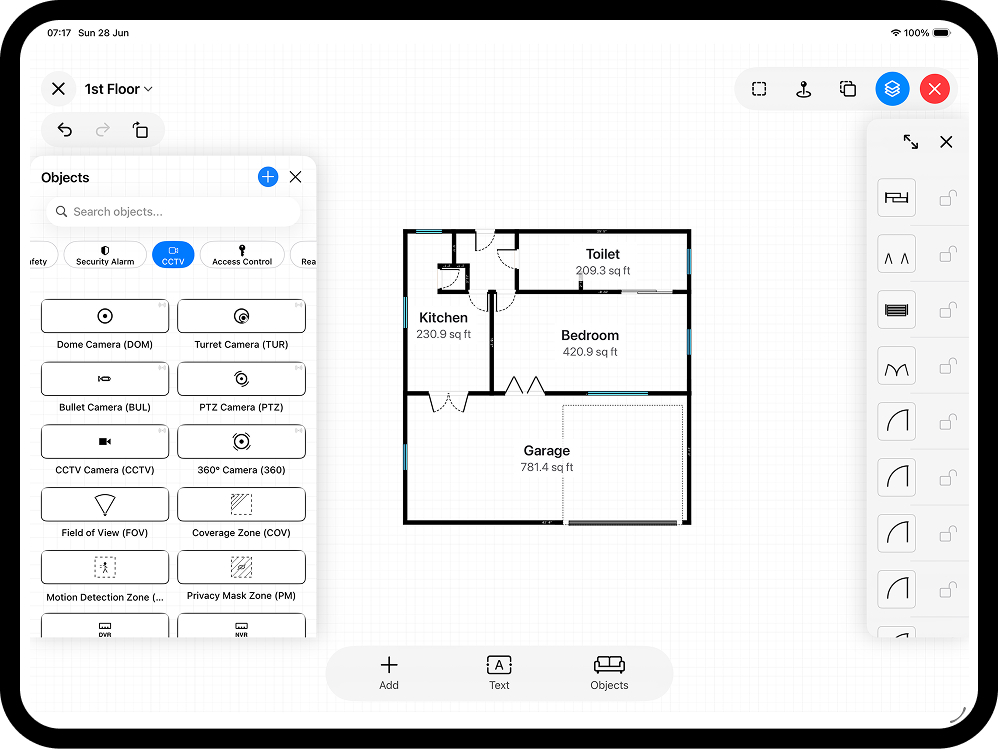
Should a floor plan be a flat 2D drawing or a 3D model? For most trade work the honest answer is both, at different moments. A 2D plan is the working document a builder, surveyor or council officer actually reads; a 3D view is what makes a client understand the space and what lets you check heights and headroom before anyone is on site. This guide sets out when each format earns its place, with the standards and numbers that matter, and shows how RoomPlot keeps both views in one plan so they never drift apart.
What 2D and 3D each do well
A 2D floor plan is a top-down, to-scale drawing: walls, openings, room areas and symbols. It is precise, prints cleanly on A4, and is the format the professional world is built around. Measurement standards such as RICS Gross Internal Area (GIA) and the International Property Measurement Standards (IPMS) are defined in plan terms, planning portals and building control expect scaled 2D drawings, and CAD interchange via DXF is fundamentally 2D geometry.
A 3D view shows the same space with height and depth. It is far easier for a non-technical client to read at a glance, and it exposes the one dimension a flat plan hides: the vertical. Ceiling heights, sloping soffits, bulkheads and stair headroom are all invisible on paper until someone annotates them, but obvious in a 3D model.
When to use a 2D plan
- Trade and council documents. Planning applications, building regulations submissions and party-wall drawings need exact dimensions, a scale bar and standard symbols. See our guide to floor plans for planning permission.
- Property listings. Rightmove's own buyer research found that over a third of buyers are less likely to enquire about a property without a floor plan, around 1 in 5 would skip the listing entirely, and 1 in 10 would never book a viewing without seeing one first. A clean, labelled 2D layout with room dimensions is the deliverable agents ask for.
- Area reporting. If you quote floor areas, a 2D plan is where GIA or IPMS measurements live. State which measurement basis you used; RICS guidance expects it, and the figures differ by a few percent between bases.
- Zone and system plans. Fire alarm zone plans, intruder alarm layouts and CCTV coverage drawings read best from above, where detector symbols and coverage cones map directly onto rooms and escape routes.
- CAD hand-off. Architects and engineers who work in AutoCAD or similar want DXF, which is inherently a 2D format. RoomPlot exports DXF directly - see exporting a floor plan to DXF.
When 3D earns its place
Reach for 3D whenever the vertical dimension carries the decision. Three situations come up constantly in survey and refurbishment work:
- Client communication. Most clients cannot mentally extrude a 2D plan. A 3D view of the same model answers "what will it feel like?" in seconds and cuts down revision rounds.
- Headroom and heights. In England, Approved Document K of the Building Regulations requires 2.0 m of clear headroom over stairs and landings; for loft conversions where that is genuinely impossible, a reduction to 1.9 m at the centre of the stair (1.8 m at the side) may be accepted - but only with building control agreement, so always confirm with your local authority or approved inspector. A 3D model with real wall and ceiling heights is the quickest way to spot where a proposed stair will fail before the joinery is ordered. Planning a conversion? Start with our loft conversion floor plan guide.
- AR walkthroughs. From a LiDAR scan on a Pro iPhone or iPad, RoomPlot can export a USDZ model that clients open in augmented reality - useful for staging, extensions and off-plan sales.
In RoomPlot, the 3D scene is rebuilt from your current plan, and on LiDAR-scanned floors you can also refer back to the original scan. You edit in 2D or 3D as the task demands; both are views of the same underlying model. For how scanning compares with drawing by hand, see LiDAR scan vs manual drawing.
Tip. Work in 2D for speed - walls, doors and symbols go down faster from above - then jump into 3D to sanity-check heights and sightlines before you export. Undo works across both views, so it is safe to experiment.
A practical workflow: 2D first, 3D to verify, export per audience
- Capture in 2D. Scan the floor with LiDAR on a supported device, or draw manually with smart snapping. Room areas are calculated automatically as you go.
- Set real heights. Enter measured wall and ceiling heights so the 3D view reflects the actual building, not defaults. Attach notes, photos or voice memos where heights vary.
- Check in 3D. Walk the model for headroom pinch points, sloping ceilings and sightlines. Fix issues on the plan; the 3D scene updates from the same data.
- Export the right format for each audience. PNG/JPG or a branded PDF report for clients and agents, multi-page PDF for multi-floor projects, DXF for the CAD team, and USDZ for 3D and AR viewing.
You do not have to choose
The real advantage of doing this in one app is that both views come from one plan. Draw or scan once, edit in whichever view suits the task, and export the right deliverable for each audience. Nothing is duplicated, so the 2D drawing and the 3D model can never drift out of step - the failure mode that plagues workflows where a separate visualiser rebuilds the model from scratch.
Want to put both views to work? Browse more floor-plan guides or read how to create a floor plan step by step, then try switching between 2D and 3D on your own plan.