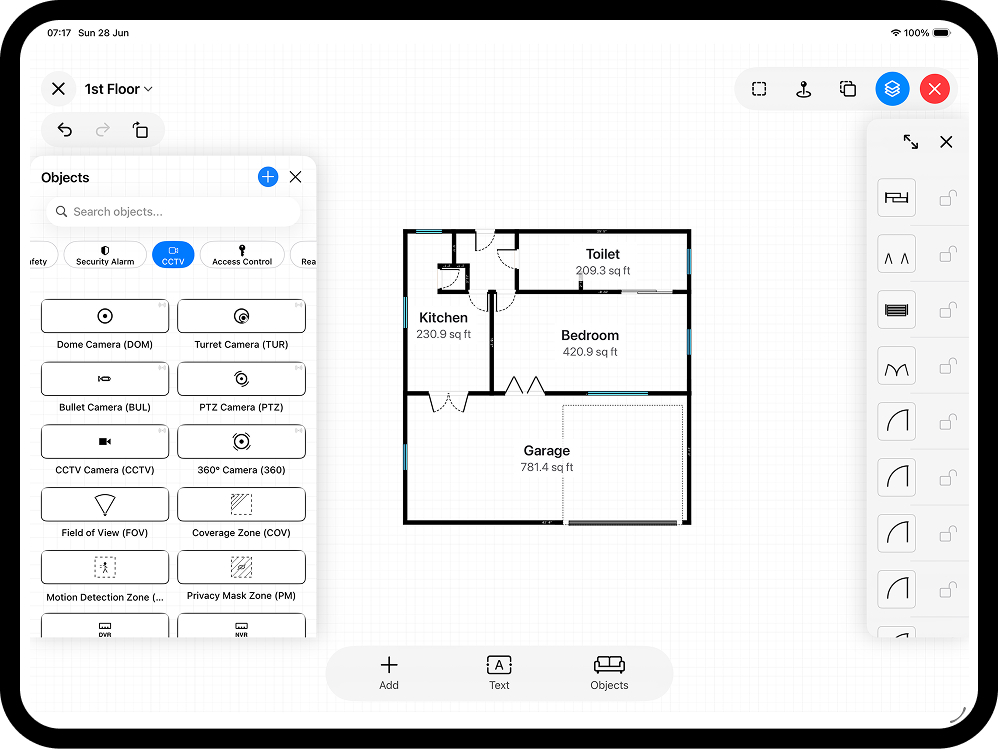
A floor plan is only as good as the measurements behind it. Get the dimensions right and everything downstream - room areas, furniture fit, a quote, a property listing - falls into place. Get them wrong and the error follows you to every desk that opens the file: RICS guidance treats measurement tolerance as something you should state, not something you hope for, and UK portals now expect plans with real numbers on them. This guide covers how to measure a room properly - LiDAR scan or tape measure - what accuracy each method actually delivers, and how to check your work before you commit.
Two ways to measure: LiDAR scan vs tape measure
There are two reliable methods, and the right one depends on the device in your pocket and the job in front of you. It helps to know the real numbers behind each.
- LiDAR scan. If you have an iPhone Pro or iPad Pro, the LiDAR scanner measures the room for you. Walk the perimeter with the camera up and RoomPlot detects walls, doors, and windows automatically, recording their positions and dimensions as you go. Apple's own testing of the underlying RoomPlan technology reports around 95% detection precision for walls and windows and about 90% for doors, with room dimensions typically landing within a few centimetres in normal interiors. It's the fastest way to capture a whole room - often under a minute - and it catches openings you might forget to note by hand.
- Tape measure or laser distance meter. On any device, or where a scan isn't practical, you measure by hand and enter the numbers. A Class 1 steel tape is rated to ±1.1 mm over 10 m (Class 2 is ±2.3 mm), and a decent laser meter tested to ISO 16331-1 is typically accurate to ±1.5 mm per shot. Paired with RoomPlot's manual editor, that gives you survey-grade control: type an exact length for any wall and the plan honours it.
You don't have to pick one. The fastest professional workflow is to scan the shell, then switch to manual editing to set the one or two dimensions that have to be exact - long walls are where scan drift accumulates, so those are the ones to verify with a laser shot. A scan in RoomPlot becomes a fully editable plan - not a flat picture - so a measured correction drops straight in.
Always capture one known dimension. Whichever method you use, make sure at least one real measurement anchors the plan. Everything else scales from it, so a single trustworthy length keeps the whole room honest - and gives you an instant sanity check on a scan.
Measuring length and width by hand
For a rectangular room, length and width are the foundation. A few habits keep them accurate:
- Measure at the floor, along the skirting, to the finished wall face. This matches how professional standards define internal area - RICS Property Measurement (2nd edition) measures residential space to the internal face of the walls - and it avoids bowing the tape around furniture or fittings.
- Keep the tape level and taut. A sagging tape reads long. Pull it tight and parallel to the wall, not at an angle across the room. With a laser meter, hold it flat against one wall and aim square at the opposite one - a skewed beam reads long too.
- Read to the millimetre, record to the centimetre. Note 3.62 m, not "about three and a half". Small roundings compound across a plan: 2 cm per wall across a six-room floor is enough to shift a whole elevation.
- Measure each wall, not opposite pairs. Rooms are rarely true rectangles. Measure all four walls - opposite walls in older UK housing stock often differ by a few centimetres, and that gap matters.
Enter each figure as you take it. In RoomPlot you can drag a wall to length or type the exact value, and switch the whole project between metric and imperial at any time - every dimension and area follows automatically, so there's no manual conversion to get wrong.
Take the diagonals to check it's square
This is the step most people skip, and it's the one that catches the biggest errors. In a true rectangle, the two diagonals are equal. Measure corner to corner both ways: if the diagonals match, the room is square; if they differ, one or more corners isn't a right angle and the room is a parallelogram or worse.
A LiDAR scan handles squareness for you because it measures geometry directly. When you're working by hand, the diagonal check is your safeguard - and the 3-4-5 rule is a quick corner test: mark 3 units along one wall and 4 along the other, and the distance between the marks is exactly 5 if the corner is a true right angle. If the diagonals don't match, trust them over a hopeful right angle and adjust the corner in the plan.
Record door and window positions
Dimensions alone don't make a usable plan - where the openings sit is what makes it readable to a builder, an agent, or a fire officer. For each door and window, capture three things:
- Width of the opening - the structural gap, not the frame or the leaf.
- Position along the wall - the distance from the nearest corner to the edge of the opening, so it lands in the right place rather than floating.
- Which way a door swings - it changes how a room is used and how an escape route reads. Note this manually even after a scan: LiDAR detects the opening reliably, but swing direction is one thing automated capture doesn't record.
A LiDAR scan picks up doors and windows automatically. Measuring by hand, you add them in the editor and slide them to the right spot: set the width, choose the door type and style, and the opening cuts cleanly into the wall. Once the geometry is in, RoomPlot detects the enclosed room and calculates its area for you - or you can set an area manually when you need exact control.
| What to measure | Typical reference |
|---|---|
| Each wall length | Along the skirting, all four walls |
| Both diagonals | Corner to corner, both ways |
| Door opening width | Structural gap, floor level |
| Opening offset | Nearest corner to edge of opening |
| Ceiling height | Floor to ceiling, for 3D and volume |
How accurate does a floor plan need to be?
It depends on what the plan is for, and the professional answer is to know your tolerance rather than chase perfection. RICS Property Measurement (2nd edition) - the standard RICS members apply to residential measurement, built on the International Property Measurement Standards (IPMS) - expects the measurer to state the tolerance the figures were taken to; in practice anywhere from roughly 1% for valuation-grade work to looser tolerances for indicative sketches can be acceptable, so long as it's declared and fit for purpose.
- Estate agency and lettings. Under National Trading Standards material-information guidance, listings must describe the property accurately, and Rightmove's own listing guides push a simple rule: every property should have a floor plan, and every plan should have measurements. Room dimensions to the nearest centimetre, captured as above, comfortably clear that bar.
- Trades and quoting. Flooring, tiling, and decorating quotes live or die on area. Measuring each wall (not assuming rectangles) and letting the app compute area removes the most common over- and under-order errors.
- Regulated work. If a plan feeds into HMO licensing, building control, or fire safety documentation, minimum room sizes and layout rules vary by scheme and local authority - measure to the finished internal face, record ceiling heights, and confirm the specific thresholds with your local authority or a competent person before relying on them.
Whatever the tolerance, the export should carry it cleanly: RoomPlot outputs PNG/JPG at A4, 300 dpi or 1080p, single or multi-page branded PDF reports, and DXF for CAD - so the same measured plan works for a portal listing, a client quote, or a drawing package.
Common accuracy mistakes to avoid
- Eyeballing instead of measuring. Guessed dimensions look fine until furniture won't fit. Scan, or enter at least one known length so the plan scales correctly.
- Assuming the room is rectangular. Most aren't. Measure every wall and take the diagonals before you trust the shape.
- Trusting a scan on long runs. Scan accuracy is excellent over normal walls, but small errors can accumulate over long, featureless runs - verify anything over about 5-6 m with a laser shot and type in the true figure.
- Forgetting openings, or measuring the frame. Record the structural opening and its position from a corner - not the trim.
- Skipping ceiling height. If you'll ever view the plan in 3D or quote on volume, you need it. RoomPlot's manual 3D editing lets you set wall heights and ceilings later, but it's quicker to note them on site.
- Rounding too early. Record the real number; let the app handle units and totals.
Frequently asked questions
Do I need a LiDAR iPhone to measure a room accurately?
No. LiDAR is faster and captures openings automatically, but a tape measure or laser meter plus exact dimensions in the editor produces an equally accurate plan on any iPhone - a Class 1 tape or an ISO 16331-1-rated laser meter is accurate to within a couple of millimetres, tighter than any scan.
How accurate is a LiDAR room scan?
In typical interiors, wall lengths and room dimensions come back within a few centimetres, and Apple reports roughly 95% detection accuracy for walls and windows. Mirrors, glass, and very long featureless walls are the weak spots - check those by hand.
How do I check a room is square?
Measure both diagonals corner to corner. If they're equal, the room is square. If they differ, a corner isn't a right angle and you should adjust the plan to match the diagonals.
Should I measure to the wall or the skirting?
Measure to the finished wall surface at floor level, running the tape along the skirting to keep it straight. That's consistent with how RICS measures internal residential area, and it keeps opposite walls comparable.
Can I fix a measurement after I've captured the room?
Yes. A scan becomes a fully editable plan, so you can select any wall and type an exact length, move an opening, or correct a corner at any time.
Measure once, measure properly, and the rest is easy. For the full workflow from capture to a client-ready file, read how to create a floor plan, browse more guides, or open RoomPlot and measure your first room in a few minutes.