
Buyers scroll past photos in seconds, but they stop on a floor plan. Rightmove's own research found that over a third of buyers are less likely to enquire about a property without one, one in five will ignore the listing altogether, and one in ten will never book a viewing until they've seen a plan. After the photo count, the floorplan is the single most important element of a listing - and the detail buyers want most on it is room dimensions. This guide shows estate and letting agents how to produce a measured, labelled, branded plan on an iPhone in the time it takes to walk the property.
Why a floor plan changes how a listing performs
A photo sells the feel of a room; a plan sells the facts. When a portal listing carries a dimensioned floor plan, applicants self-qualify before they ever book a viewing - they can see the layout, the flow between rooms, and the real size of each space. That means fewer viewings that go nowhere, and the viewings you do run are with people who already understand the property. The numbers back this up:
- Over a third of buyers told Rightmove they are less likely to enquire about a property that has no floorplan.
- One in five buyers would ignore a listing without a plan entirely, or only come back to it if nothing else interested them.
- One in ten buyers would never arrange a viewing without seeing a floorplan first.
- Room dimensions are the most-wanted detail on the plan itself - buyers rate them above everything else, because they answer the "will my furniture fit?" question a gallery never can. As one buyer in Rightmove's research put it: "pictures can be deceptive, a floorplan is more definitive."
There's a professional signal too. A clean, branded plan tells applicants - and prospective vendors on a valuation - that the agent is thorough. In a market where most listings on the major portals now carry a plan, not having one makes a listing look incomplete.
Accuracy, measurement standards, and material information
Since 6 April 2025, the Digital Markets, Competition and Consumers Act 2024 (DMCC Act) has replaced the old Consumer Protection from Unfair Trading Regulations, and in May 2025 National Trading Standards withdrew its Material Information guidance (Parts A-C) that agents had worked to since 2022. The duty itself has not gone away - under the DMCC Act, omitting material information from a listing is automatically an unfair commercial practice, and the Competition and Markets Authority can now fine agents directly without going through the courts. The practical takeaway for floor plans: the sizes and layout you publish need to be honest and measured, not estimated. If in doubt about what counts as material for a particular property, check the current CMA guidance or ask your compliance contact.
On measurement bases: Gross Internal Area (GIA) remains the de facto convention for residential marketing plans in England and Wales, while RICS members working to RICS Property Measurement (2nd edition) have used IPMS: Residential Buildings for new instructions since May 2018. RoomPlot reports the measured area of the rooms you capture; it does not claim a formal standard or a regulated area class. For a listing plan that's exactly what you want - accurate room-by-room figures from real geometry - but if a transaction needs a certified GIA or IPMS figure (a valuation report, a lease), that's a job for a RICS-qualified measurer.
What you'll need
- An iPhone or iPad. Any recent model can draw a plan by hand. Models with a LiDAR scanner (iPhone Pro and iPad Pro) can also scan a room automatically, which is the fastest option on a busy day of valuations.
- RoomPlot - it captures, measures, labels, and exports a branded plan in one place, so the whole job happens on the device in your pocket. There's a free tier to try the workflow on a real property before committing.
- A few minutes per room. Less once you've done a couple of properties.
Step 1 - Capture the property fast
Speed matters on a valuation or a check-in, so start with whichever method is quickest for the device in your hand. If you have a LiDAR iPhone or iPad, scan: point the camera and walk the perimeter of each room, and RoomPlot detects the walls, doors, and windows automatically in seconds. No LiDAR, or you'd rather start from a blank canvas? Draw the walls by hand - smart snapping keeps corners square and walls aligned, so even a quick freehand sketch comes out clean.
A whole flat or house is just several rooms captured in turn. For a property over more than one storey, add a floor for each level and switch between them in the same project, then combine them into a single plan for the listing.
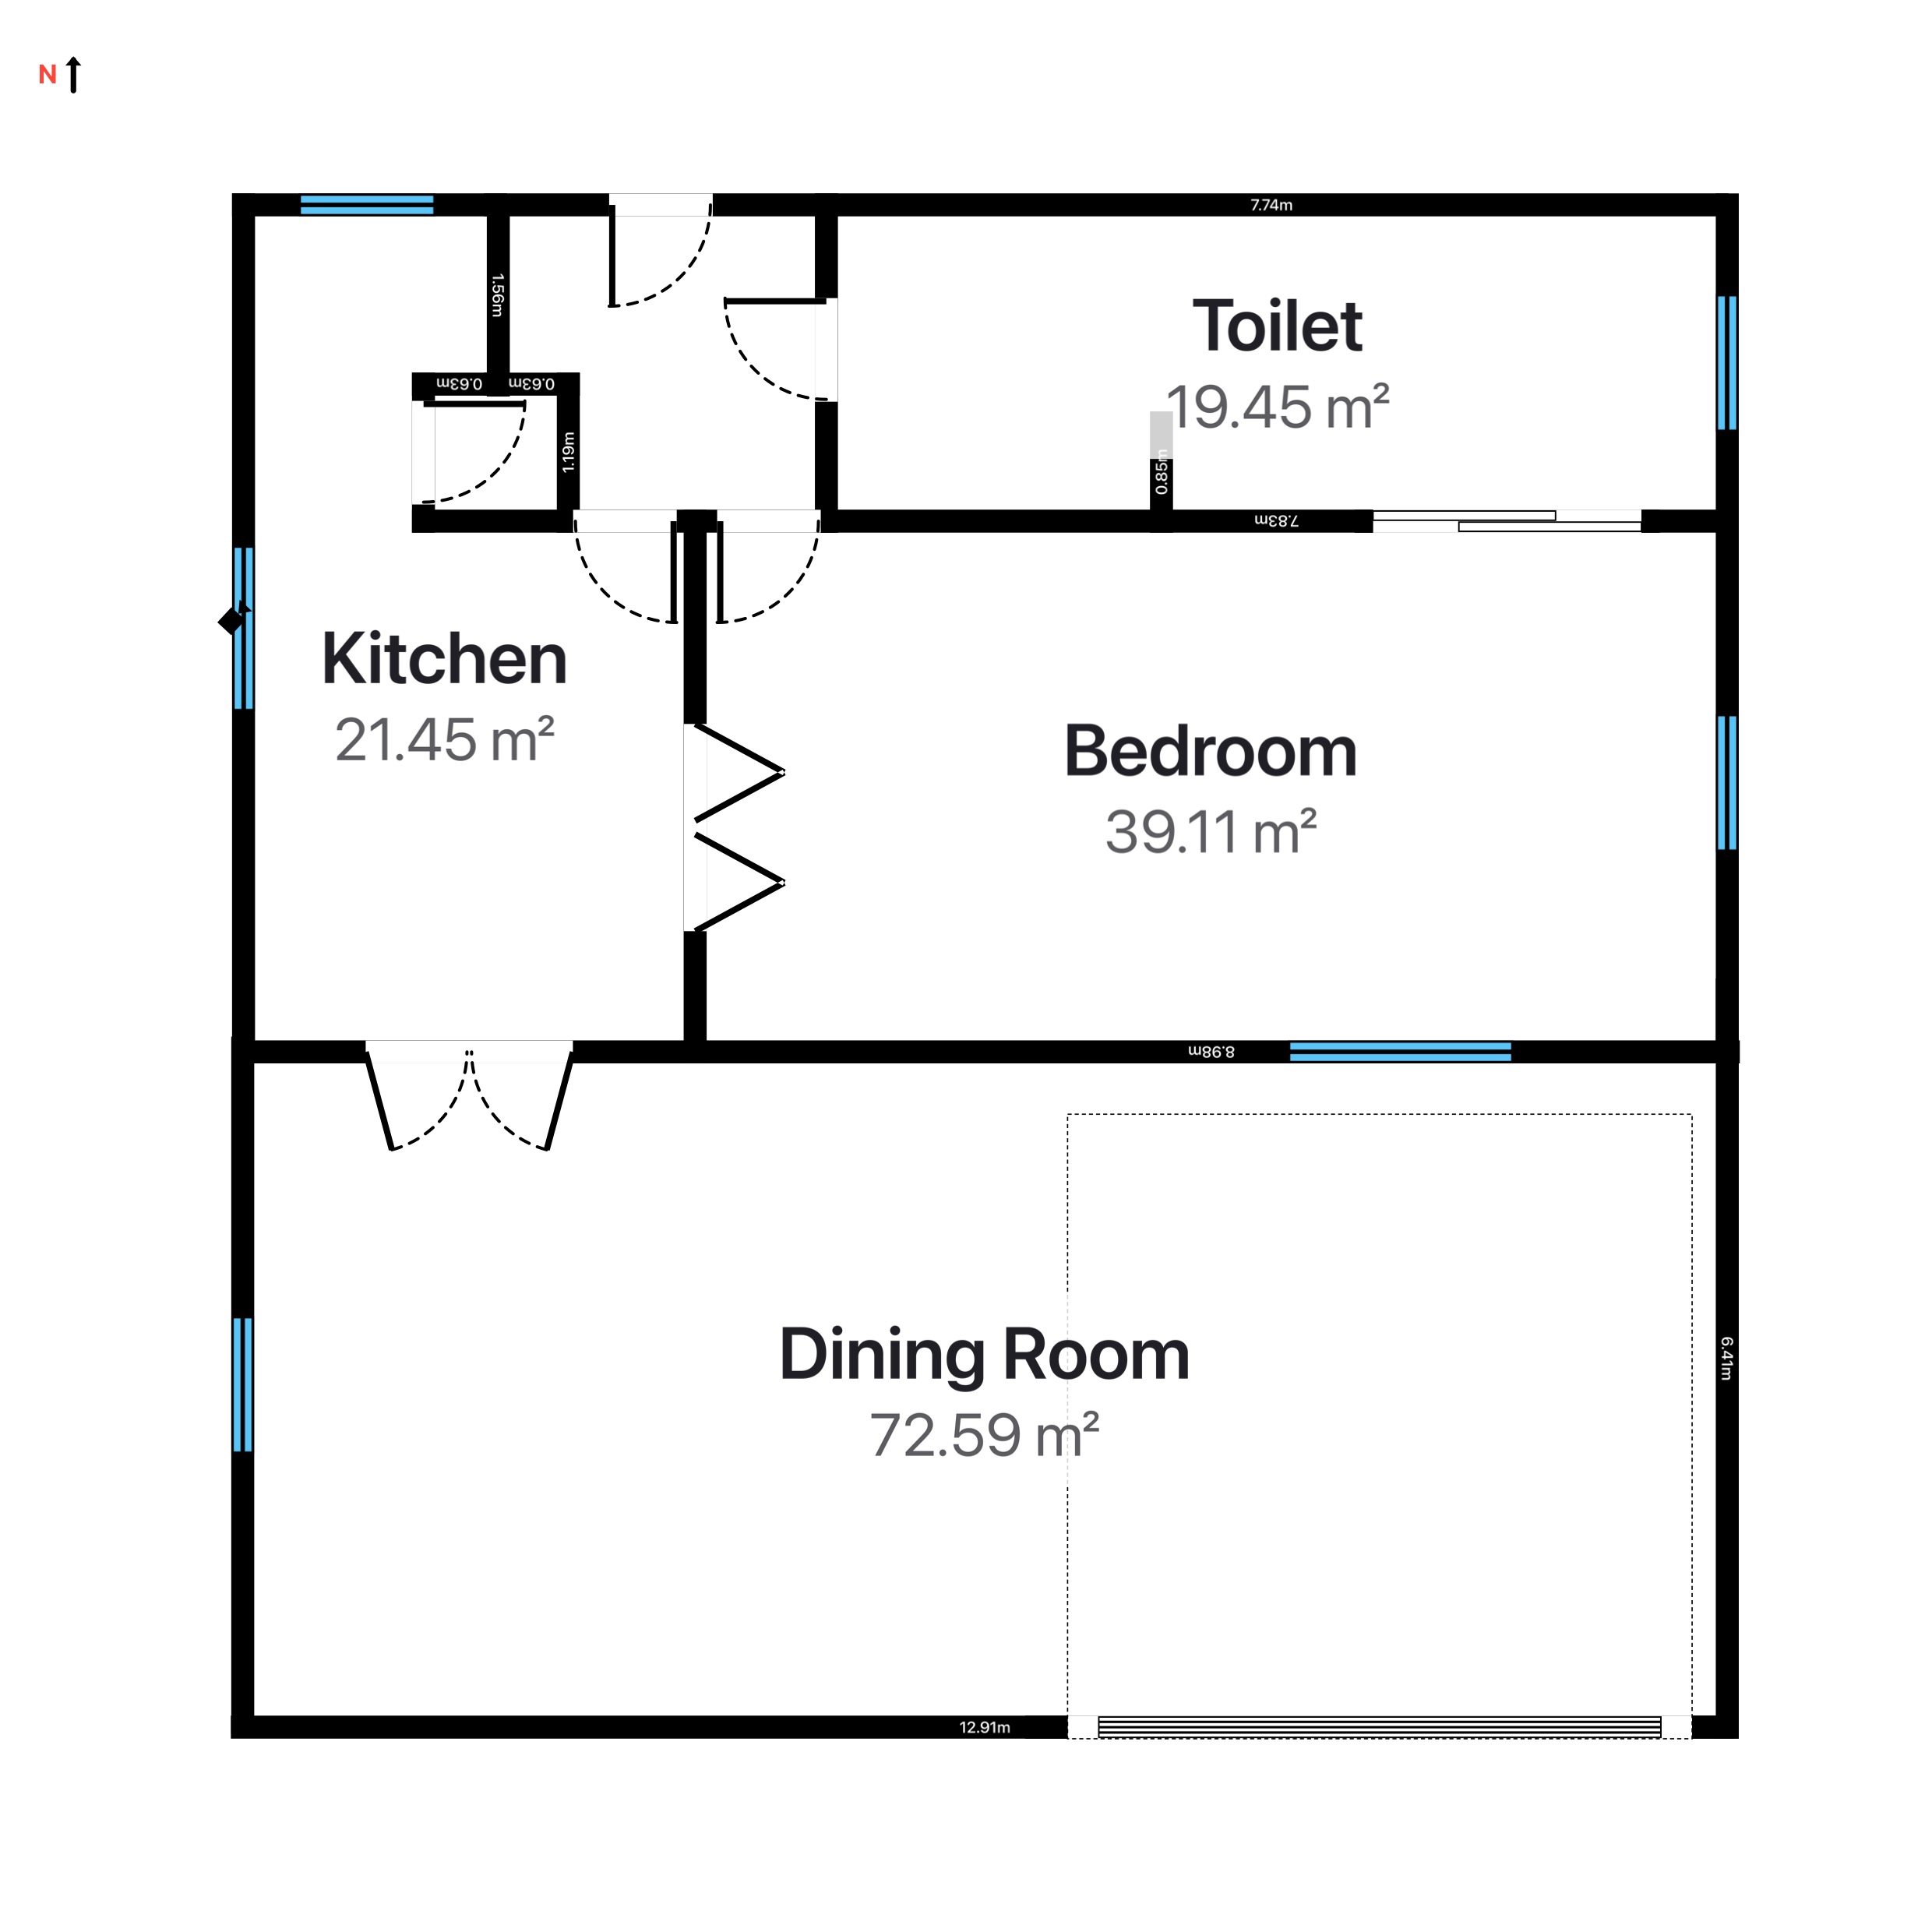
Scan first, tidy after. The quickest workflow on site is to LiDAR-scan the shell, then switch to manual editing to straighten one wall or set an exact length. A scan turns straight into a fully editable plan - it's never a flat picture you're stuck with.
Step 2 - Capture accurate room areas
This is the part that does the selling. RoomPlot detects each enclosed room automatically and calculates its area for you, so the figure on the plan comes from the geometry you captured rather than a guess. You can also set an area manually when you need exact control over a particular space. Name each room - Reception, Kitchen, Bedroom 1 - and you instantly have the room-by-room breakdown an applicant looks for first.
Work in whichever units your market expects: switch the whole project between metric and imperial at any time and every dimension and area follows. Many UK agents show both square metres and square feet; RoomPlot lets you produce the plan in the unit your portal and your applicants read most easily.
| Room | Area (metric) | Area (imperial) |
|---|---|---|
| Reception | 19.6 m² | 211 ft² |
| Bedroom 1 | 13.2 m² | 142 ft² |
| Bedroom 2 | 9.8 m² | 105 ft² |
Step 3 - Add the dimensions buyers actually use
Areas tell applicants how big a room is; dimensions tell them whether their things will fit - and Rightmove's research found room dimensions are the single feature buyers most want to see on a plan. RoomPlot shows on-plan dimensions and a scale bar, so the plan reads correctly whether it's viewed full-screen on a portal or shrunk into a brochure. You don't need every wall dimensioned - a few well-placed measurements on the main rooms do the job without cluttering the drawing.
- Show the overall width and depth of each principal room - a UK double bed is 1.35 m wide and a king 1.5 m, so a labelled 2.8 m bedroom wall answers the "real double or box room?" question by itself.
- Keep the labels uncluttered - clarity beats completeness on a listing plan.
- Set a wall to an exact length when you want a key dimension to be precise.
Step 4 - Make it clearly yours
A listing plan should look like it came from your agency, not from nowhere. RoomPlot lets you build a plan that's tidy and on-brand before it goes anywhere near a portal:
- Styled room labels. Add clean, readable room and area labels with consistent styling across the plan.
- A North marker. Set true north once and it stamps onto the plan - the fastest way to show a south-facing garden without writing a word.
- Company branding. Add your company logo and details so the plan carries your agency's identity through to the report.
- Layers for a clean result. Reorder, hide, or lock elements so the final plan shows exactly what you want an applicant to see.
Step 5 - Export a portal-ready plan
When the plan is right, RoomPlot exports it in the formats a listing workflow needs, straight from the device:
- Image (PNG/JPG) - a crisp plan image at A4, 300 dpi, or 1080p to upload to the portal alongside the photos, or drop into a brochure or a window card.
- Branded PDF - a clean print-ready page, or a multi-page report with an area summary, client and company details, and your branding for a valuation pack.
For most listings, a clear image or a single PDF page is all the portal needs. If a buyer's architect or a contractor later wants editable geometry, the same plan can also export to DXF - but that's a follow-on, not part of the listing itself.
One plan, many uses. The same captured property gives you the listing image, the valuation-pack PDF, and the room-by-room area summary. Capture once on the viewing, reuse everywhere.
A faster routine on the viewing
The agents who get the most from this build it into the visit rather than treating it as office work. A simple routine on a two- or three-bed property:
- Scan or sketch each room as you walk through, room by room.
- Drop in the doors and windows so the layout reads correctly.
- Name the rooms and let RoomPlot calculate the areas.
- Add a couple of key dimensions to the principal rooms.
- Set north, check the units, and export the image and the PDF before you leave.
Because RoomPlot auto-saves your work - and with iCloud sync enabled (Settings → iCloud Sync) can sync individual plans across your devices - you can capture on an iPhone at the property and finish on an iPad back at the desk. The plan, your client details, and your branding travel with you.
Common mistakes to avoid
- Eyeballing instead of measuring. Scan the room or set at least one known dimension so the whole plan scales correctly and the areas can be trusted - under the DMCC Act, misleading sizes on a listing are a compliance risk, not just an embarrassment.
- Leaving rooms unlabelled. Applicants look for room names and areas first - an unnamed box on a plan tells them nothing.
- Over-dimensioning. A plan crammed with every measurement is harder to read than one with a few clear ones. Principal rooms only.
- Forgetting the brand. An unbranded plan does nothing for your agency. Add the logo once and it carries through.
- Publishing without a sense check. Thirty seconds comparing the plan against the rooms you just walked catches the transposed dimension before an applicant does.
Frequently asked questions
Do I need a LiDAR iPhone to make a listing plan?
No. LiDAR makes capture faster, but you can draw an accurate, fully dimensioned plan by hand on any iPhone using snapping and exact lengths.
Is a floor plan legally required on a UK listing?
There is no blanket law saying every listing must carry a plan, but under the DMCC Act 2024 any information you do publish - including sizes and layout - must not mislead, and omitting material information is an unfair commercial practice enforceable by the CMA. Check current CMA guidance for what applies to a specific property.
Can I show areas in both square metres and square feet?
You can switch the whole project between metric and imperial at any time, and every dimension and area updates. Pick the unit your portal and your applicants read most easily.
What format should I upload to a portal?
A clean plan image (PNG or JPG) for the listing gallery, or a branded PDF page for a valuation pack. Both come from the same plan.
How accurate are the room areas?
RoomPlot calculates each area from the geometry you capture, so accuracy follows how carefully you scan or draw. It reports measured areas for the listing rather than certifying a formal basis such as GIA or IPMS - if a transaction needs a certified figure, use a RICS-qualified measurer.
Want the full capture-to-export walkthrough, or a refresher on measuring a room cleanly? Read how to create a floor plan and how to measure a room, or browse more guides. Then make a plan for your next listing on the very next viewing - it takes a few minutes and it does the qualifying for you.