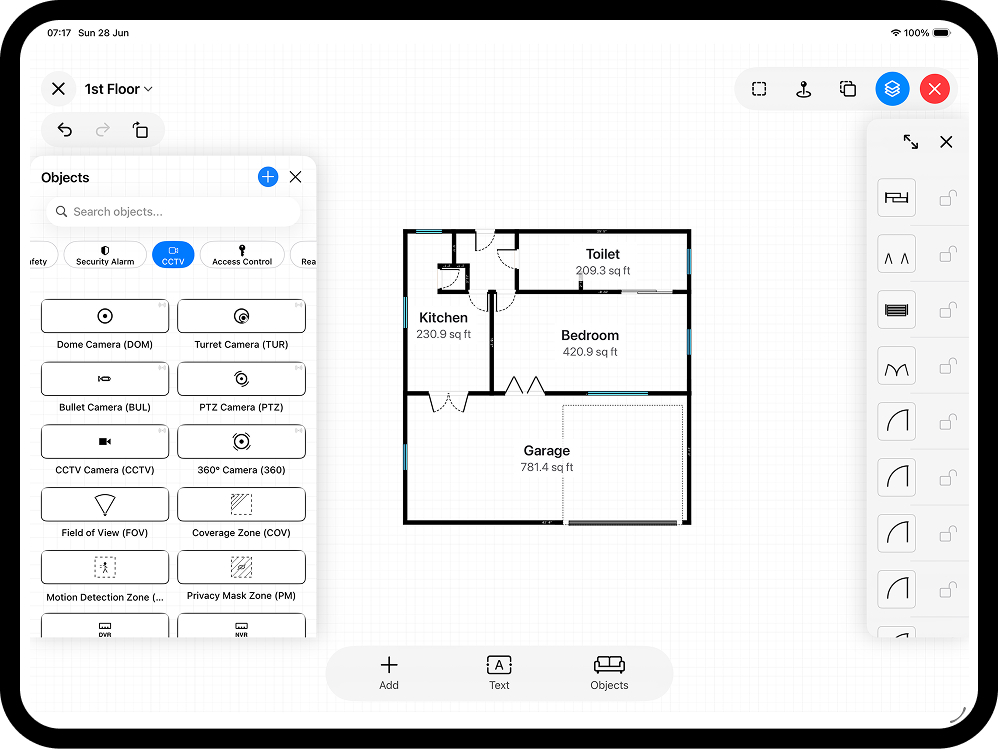
A floor plan looks simple until you have to act on one - quote a job, brief a trade, or decide whether a double bed fits. Then the scale, the symbols and the dimensions all matter, and misreading any of them costs money. It matters commercially too: Rightmove's own listing guidance reports that properties launched without a floor plan lose around 52% of views compared with those that have one. This guide breaks down the four things every plan tells you - orientation, scale, symbols and dimensions - with a worked example, plus the checks a professional runs before trusting a plan.
A floor plan is a view from above
A floor plan is a scaled drawing of one storey seen from directly overhead, as if the building were sliced horizontally about a metre above the floor and the top lifted off. That slice height is why windows appear in the walls but rooflights do not, and why anything above the cut line - a beam, a sloping ceiling, the edge of a loft hatch - is shown dashed rather than solid. Walls are the thick lines, rooms are the spaces between them, and fixed features - doors, windows, stairs, kitchen and bathroom fittings - use standard symbols. Read it like a map: find the entrance, check the north arrow, then move room to room.
Scale - how the drawing maps to reality
Scale is the ratio between the drawing and the real building. At 1:100, one centimetre on paper equals one metre on site - the usual choice for showing a whole floor or building on one sheet. At 1:50, everything doubles: 20 mm on the page equals one metre, which is why 1:50 is the standard for room-level residential detail - there is enough space to draw true wall thicknesses, door swings and sanitary fittings without crowding. Site plans typically sit at 1:200 or 1:500.
The safest guide is the scale bar: a small printed ruler that stays accurate even when the page is resized, photocopied or viewed on a phone - which is exactly when a stated ratio like "1:50" becomes wrong. If a plan has neither a scale bar nor dimensions, treat it as a sketch, not a measurement document.
Symbols - reading walls, doors, and windows
- Walls are the thick, solid lines that form the outline and divide rooms. External walls are usually drawn thicker than internal partitions; on detailed plans, hatching inside the wall indicates the construction (masonry, stud, blockwork).
- Doors are a gap in the wall with a straight leaf and a quarter-circle arc. The arc shows which way the door swings - clearance, furniture placement and traffic flow all hang off it. The width of the gap is real information too: in England, Approved Document M expects a clear opening width of at least 775 mm at the private entrance of a new dwelling, so an unusually narrow opening on a plan is worth querying with the designer or building control.
- Windows are a break in the wall crossed by a thinner line or bar; three parallel lines often indicate the frame and glazing.
- Stairs are a run of parallel lines with an arrow marking up or down; a diagonal break line shows where the stair passes out of the slice.
- Fittings - sink, bath, hob, WC - use recognisable little plan shapes. Trades add their own layers on top: sockets, radiators, detector heads, CCTV positions.
Once the door swing clicks into place, plans get much easier: you can see at a glance whether a door will foul a radiator, block a cupboard, or clash with the swing of the door next to it.
Tip. Check the north arrow before anything else. It tells you which rooms get the morning or evening sun and which way the garden faces - the same plan reads very differently once you know which way is north. See adding a north arrow.
Dimensions - the real sizes
Dimensions are the numbers printed along walls and across rooms, in metres and millimetres or feet and inches. Overall dimensions run along the outside edges; internal ones give room sizes and key openings. Read them together with the scale: if a bedroom measures 3.6 m by 2.8 m, you can judge immediately whether a double bed and a wardrobe will fit. Two conventions to watch:
- Maximum points. UK sales plans usually quote each room at its widest and longest points, often "into bay" or "into wardrobe" - so an L-shaped room is smaller than its headline figures suggest.
- Floor areas. A quoted total is normally Gross Internal Area (GIA) - the area measured to the internal face of the perimeter walls at each floor level, as defined in the RICS Code of Measuring Practice. RICS archived its Property Measurement 2nd edition in June 2025 pending an updated code, so a professional plan should state which measurement basis it used - if a plan quotes an area with no basis, ask.
Dashed lines usually mean something above the cut line - a beam, reduced head height under a sloping ceiling, or the edge of a mezzanine - rather than a wall.
A 60-second checklist before you trust a plan
- Orientation: find the north arrow and the entrance, and match the plan against the site or the listing photos.
- Scale: read the scale bar, then sanity-check it against one known dimension - an internal door opening is roughly 0.8 m, a standard bath about 1.7 m long.
- Symbols: walk the rooms following the door swings; flag any swing that fouls fittings or another door.
- Dimensions: check that the overall external dimensions roughly equal the sum of the rooms plus wall thicknesses; if they don't, something was measured or drawn wrong.
- Date and revision: an old plan may predate an extension or a moved partition - verify on site before pricing work from it.
Put it together
Reading a plan is a habit: find the entrance, set north, read the scale bar, then walk the rooms following the door swings and checking the dimensions as you go. A well-drawn plan makes all of that effortless, which is the point - clarity is a feature, not a luxury. RoomPlot draws every door with a true swing arc, keeps dimensions tied to the geometry with automatic room areas, switches between metric and imperial, and lets you place a North marker on the plan, so the plans you make are as easy to read as the ones in this guide.
Now that the symbols make sense, try making one of your own: scan a room with the LiDAR AR scan on a Pro iPhone or iPad, or draw it manually with smart snapping - see how to create a floor plan or browse all guides. Label it, add dimensions, and export a PDF or PNG anyone can read at a glance.