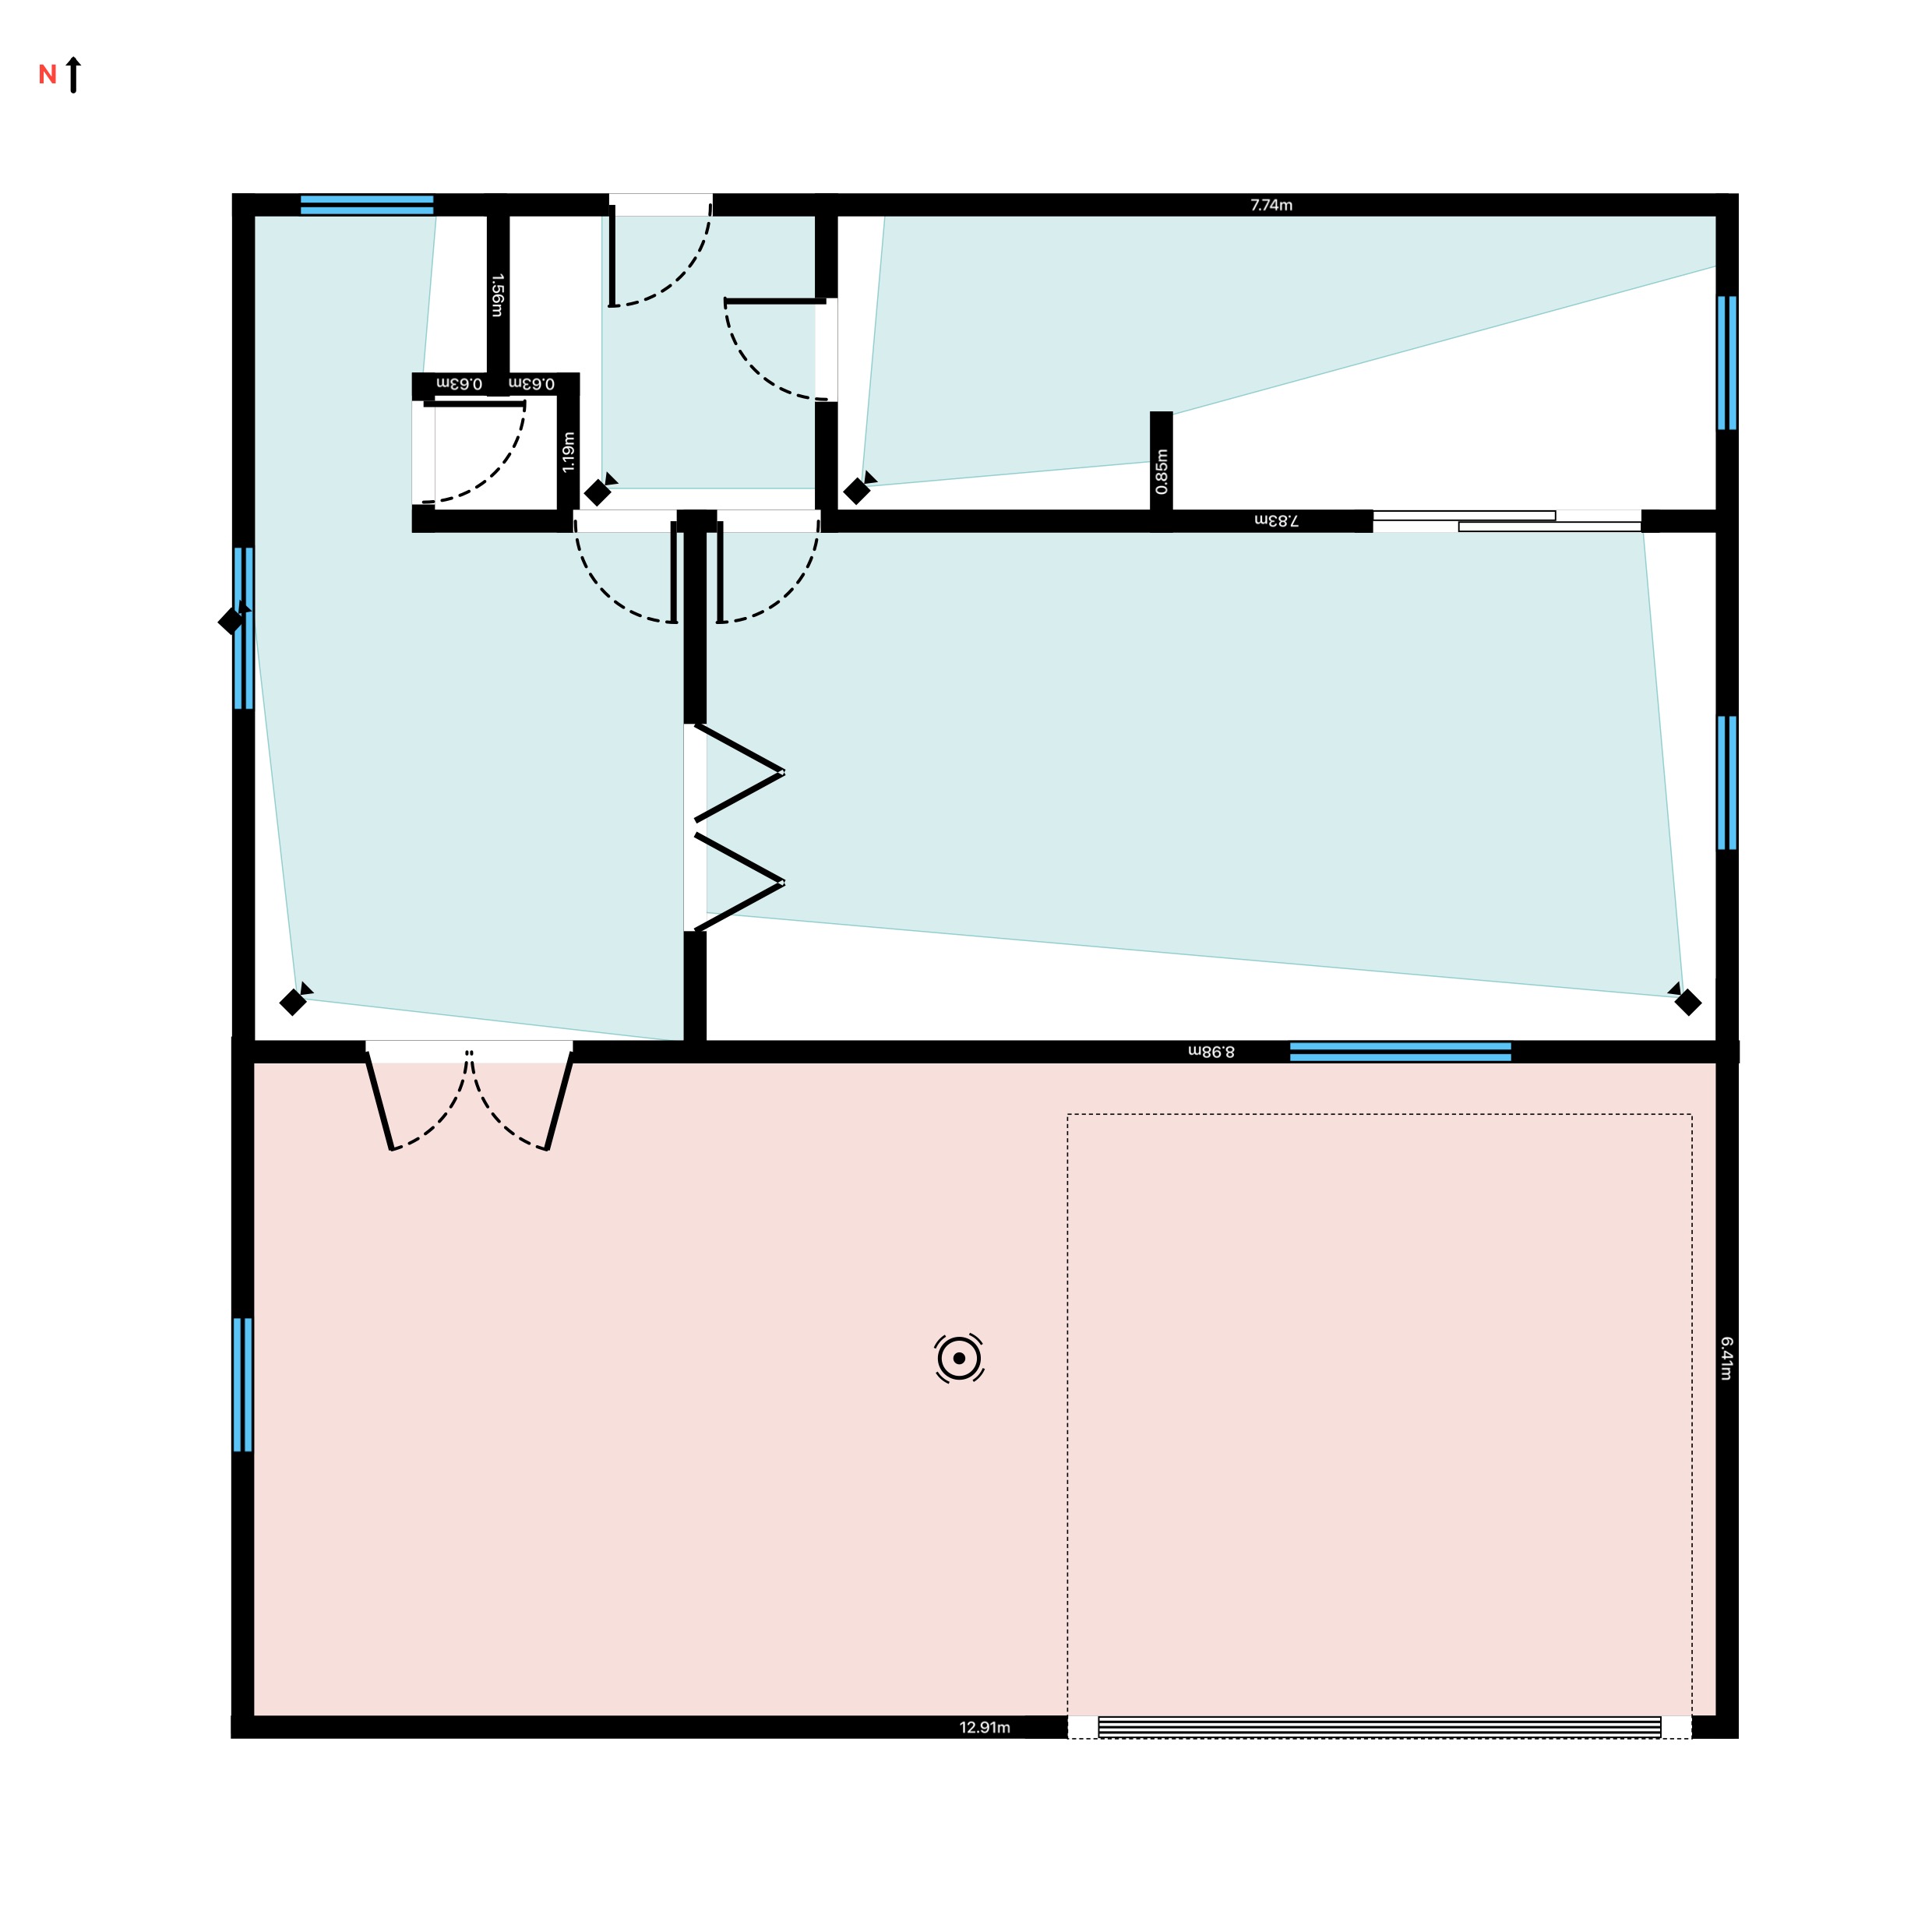
An intruder alarm is only as good as its blind spots. A PIR aimed across a sofa, a contact missing from the patio door, a hallway the beam never sweeps - any of them turns a tidy spec sheet into a real vulnerability. In the UK, professional systems are also specified against a standard: PD 6662:2017 (the UK scheme for the BS EN 50131 series) sets four security grades, and your layout has to deliver the grade before it can pass sign-off. This guide walks through planning an intruder alarm layout on a floor plan with RoomPlot, including the one thing most tools cannot do: showing where each detector actually sees.
Start with the grade, not the gear
Before a single symbol goes on the plan, pin down the security grade. BS EN 50131-1 (adopted in the UK through PD 6662:2017) classifies systems from Grade 1 to Grade 4 by the skill and tooling of the expected intruder:
- Grade 1 - low risk; an opportunist with little knowledge of alarms. Rarely accepted by insurers.
- Grade 2 - most domestic properties and low-risk commercial. The intruder is assumed to have some knowledge of alarm systems and a general toolkit. PD 6662:2017 also allows a Grade 2 'bells only' option, designated 2E.
- Grade 3 - higher-risk commercial and high-value homes; the intruder is expected to be skilled, with portable tools and equipment. Often demanded by insurers for stock-heavy premises.
- Grade 4 - highest risk, where security takes precedence over all other factors.
The grade drives everything downstream: detector types, tamper protection, signalling and standby power. If the client's insurer has specified a grade in the policy schedule, get it in writing before you survey - designing a Grade 2 layout for a Grade 3 requirement means doing the plan twice.
The devices an intruder system needs
RoomPlot ships a 50-item Security Alarm symbol library, so you can lay out the whole system to a recognised standard. The core pieces:
- Control panel and keypad - the brain and the user interface, usually near the main entry and a discreet utility space.
- PIR and dual-tech detectors - the movement sensors that cover each protected room, including pet-immune versions for occupied homes.
- Door and window contacts - perimeter protection on every accessible opening.
- Sounders, strobes and a bell box - internal and external warning devices.
- Beam and glass-break detectors - for long runs, conservatories and large glazed elevations.
Coverage you can actually see
Place a PIR and RoomPlot draws its field of view as a cone, then clips that cone against the walls. It is a true visibility calculation: the sensor only covers the part of the room it can see, and blind spots behind corners and furniture update live as you rotate or move the device. A motion detector defaults to a 90 degree by 12 m cone, and you can edit the field of view from 10 to 360 degrees and the range from 1 to 40 m. Aim it by rotating the symbol on the canvas.
Placement rules that survive commissioning
A cone on a plan is only honest if the physical placement matches. The rules that matter most on site:
- Make the intruder cross the beam. A PIR is far more sensitive to movement across its detection pattern than movement straight towards it. Aim the cone across the likely approach - ideally at 90 degrees to it - not down the intruder's line of travel.
- Own the choke points. A detector on the hallway, landing or stairwell catches an intruder whichever room they came in through. One well-placed choke-point PIR often outperforms two in bedrooms.
- Mount at the height on the datasheet. Most standard PIRs are characterised at roughly 2.1-2.4 m; mounting higher or lower changes the pattern, so note the intended height against the symbol so the pattern on your plan holds on the wall.
- Keep clear of heat. Site PIRs at least ~3 m from radiators, heating vents, sunny glazing and appliances that cycle heat - rapid temperature change is the classic false-alarm trigger.
- Never aim through glass. PIRs do not detect reliably through windows or glazed doors, so a cone that crosses a conservatory wall on your plan is a fiction - use a contact or glass-break there instead.
- Pet-immune where it counts. In occupied homes, specify pet-immune lenses in rooms animals can reach, and avoid aiming any PIR at furniture a cat can climb into the detection zone.
Lay out the system step by step
- Capture the property. Scan each floor with the LiDAR AR scan on a Pro device, or draw it manually with smart snapping, so room shapes and openings are correct.
- Protect the perimeter first. Add a contact to every external door and accessible window, then a bell box high on the front elevation.
- Cover the volumes. Place a PIR in each room, aim the cone across the approach, and nudge it until the blind spots fall on low-value corners, not on the route to the safe or the back door.
- Set the colours and zones. Override a device colour where two systems share a plan, and label zones so the engineer commissioning it can follow your intent - and so the zone chart in the panel matches the drawing.
- Annotate for the install. Pin notes and photos to devices - cable routes, mounting heights, fused-spur positions - so the plan doubles as the first-fix sheet.
Design for police response from day one
If the client wants police attendance rather than a keyholder call, the layout has to support a confirmed alarm under the NPCC Security Systems Policy. That means a Unique Reference Number (URN) issued against a system installed by an NSI or SSAIB certificated company, monitored by an approved ARC, and designed to BS 8243 so activations can be confirmed - typically by two independent detectors triggering in sequence, or by audio or visual verification. On the plan, sequential confirmation is a layout problem: an intruder's route through the protected area should cross at least two detection zones, so overlap your cones along the likely paths instead of tiling rooms one detector each.
The stakes are concrete: under the NPCC policy, two false calls in a rolling 12-month period trigger a written warning, and a third sees police response withdrawn to keyholder-only. Force-level details vary, so confirm URN and signalling requirements with the local police force and the client's insurer before you fix the design.
Tip. Walk the finished plan as if you were the intruder. If you can trace a path from any opening to a target room without crossing a blue cone, you have found a gap a survey would have missed - and if any path crosses only one cone, you have found a route that can never generate a sequentially confirmed alarm.
Hand over a plan, not a promise
When the layout is right, export it. The single-page PDF or PNG drops straight into a quote, and the multi-page branded report adds a cover page, the symbol legend and the coverage overlay for a professional proposal - useful evidence when the insurer or ARC asks how the grade is met. Pair it with our guide to the CCTV camera coverage plan when a job needs both intruder and surveillance on the same drawing.
Win the job on coverage
Clients buy certainty. A plan that shows exactly where every sensor sees, states the grade it is designed to, and leaves no hand-waving about blind spots closes more surveys than a parts list ever will. Explore the full set of RoomPlot guides to take your security designs from site visit to signed contract.